Roblox Storage Hunters Guide: 15+ Pro Tips
- Getting Started: The Junkyard Strategy
- The Back Alley Key: Don’t Sell This Item
- Back Alley: Mythic & Legendary Accessories
- The Private Server Advantage
- Collection Book & Lost Items: Your Luck Farm
- Mutation Shops: What to Look For
- All Garage Locations & Net Worth Requirements
- Item Cleaning: When It’s Actually Worth It
- Item Grading: Boost Your Item Values
- The Time Capsule Explained
- How to Boost Your Luck
- Energy Drinks: How to Use Them Effectively
- Upgrades You Should Prioritize
- Game Passes: Which Ones Are Worth Buying?
- NPC Quests & Index Rewards
- Fishing Rods: What You Need to Know
- All Mutations Overview
- Summary: Your Step-by-Step Progression Plan
Are you struggling to make money in Storage Hunters? Not sure how to increase your luck or which upgrades actually matter?
I’ve spent hours grinding through every garage, testing every mechanic, and learning what actually works in this game. The truth is, most beginners waste time on the wrong things and miss out on easy money and rare items.
In this complete Storage Hunters: Open World guide, I’ll walk you through every pro tip and trick I’ve discovered, from the junkyard all the way to the million-dollar garages. Whether you’re brand new or stuck in the mid-game, this guide will help you progress faster.
Getting Started: The Junkyard Strategy
If you’re brand new to Storage Hunters, the first thing you should do is complete the tutorial. It teaches the basics and sets you up for everything that follows. Once that’s done, head straight to the Junkyard.
How to Start Your First Auction
Go to the Scrap Garage and start an auction. Here’s what you need to know:
When you start an auction, you can actually check if it’s worth bidding on before you commit any money. The key indicator is the starting price.
- Low starting price? Feel free to walk away and try another auction. You’re not locked in.
- High starting price? This usually indicates better items inside. Place your bid.
This is purely luck-based, so don’t get discouraged if you hit a few bad auctions in a row. Just keep cycling through them until you find one with a promising starting price.
Pro Tip: Use X-Ray Vision
If you have access to X-ray vision, it will literally show you what’s inside a container before you bid. This removes the guesswork entirely. Use it whenever possible, especially on higher-value garages later in the game.
Your First Goal: 750 Net Worth
Aim to reach 750 net worth as quickly as possible. This unlocks your next major opportunity, which I’ll explain in the next section.
The Back Alley Key: Don’t Sell This Item
This is one of the most important tips in the entire guide, and I see beginners mess this up constantly.
Where to Find the Key
Make your way to the bridge on the left side of the farmyard. There’s a lost item here, a Key, that you can pick up for free.
The Key looks like a standard lost item sitting on the ground. Walk up to it, pick it up, and whatever you do: do not sell it.
What the Key Unlocks
Once you have the Key, head to the Back Alley area. There’s a locked door here that the Key opens. Inside, you’ll find a Scythe that you can sell for quite a lot of money, especially helpful when you’re just starting out.
If you accidentally sell the Key, don’t panic. It respawns, so you can go back to the bridge and pick it up again. But it’s much easier to just hold onto it the first time.
Back Alley: Mythic & Legendary Accessories
Once you hit 750 net worth, make your way to the Back Alley. This area offers Mythic and Legendary accessories that provide powerful boosts. These items become easier to obtain with higher luck stats, which I’ll cover in detail later.
Best Accessories to Aim For
Here are the accessories worth grinding for:
| Accessory Type | Benefit |
|---|---|
| Bid Zone Width | Increases auction success rate |
| Aerial Speed | Useful for chasing fast mutations |
| Head & Wrist Accessories | Extend energy drink duration |
That last one is especially important. Energy drinks (potions) are incredibly powerful in Storage Hunters, and extending their duration gives you more value from every drink you use.
How to Equip Accessories
Open your inventory, navigate to the Accessories tab, and equip what you’ve collected. You can mix and match different accessories to stack their effects.
The Private Server Advantage
If you’re serious about making money quickly, I highly recommend playing in a private server. Here’s why:
In a public server, your player shop might spawn in a terrible location far from where you’re grinding. You’ll waste time traveling back and forth between the garage and your shop.
In a private server, you can place your shop much closer to your grinding area. Less travel time means more auctions per hour, which means more money.
This tip alone made a huge difference in my progression speed.
Collection Book & Lost Items: Your Luck Farm
Completing your Collection Book is one of the most overlooked ways to boost your luck. Every collection milestone rewards you with luck points, and luck affects everything, better items, rarer mutations, and more money.
Why Lost Items Matter
Scattered across the map are hidden lost items. Some of these are worth a lot of money (great for beginners), and collecting them all contributes to your Collection Book.
I recommend finding every lost item on the map. There are guides available showing all locations, and the time investment pays off through both immediate cash and long-term luck bonuses.
Mutation Shops: What to Look For
Sometimes, a shop front will display a mutation effect, like a “Camel Shop” or something different from the standard appearance.
If you see a shop with a mutation effect on the shutter door, participate in it. These shops require around 3,000 net worth but offer better luck and better rewards than standard shops.
Don’t skip these. They’re one of the best ways to accelerate your progress in the mid-game.
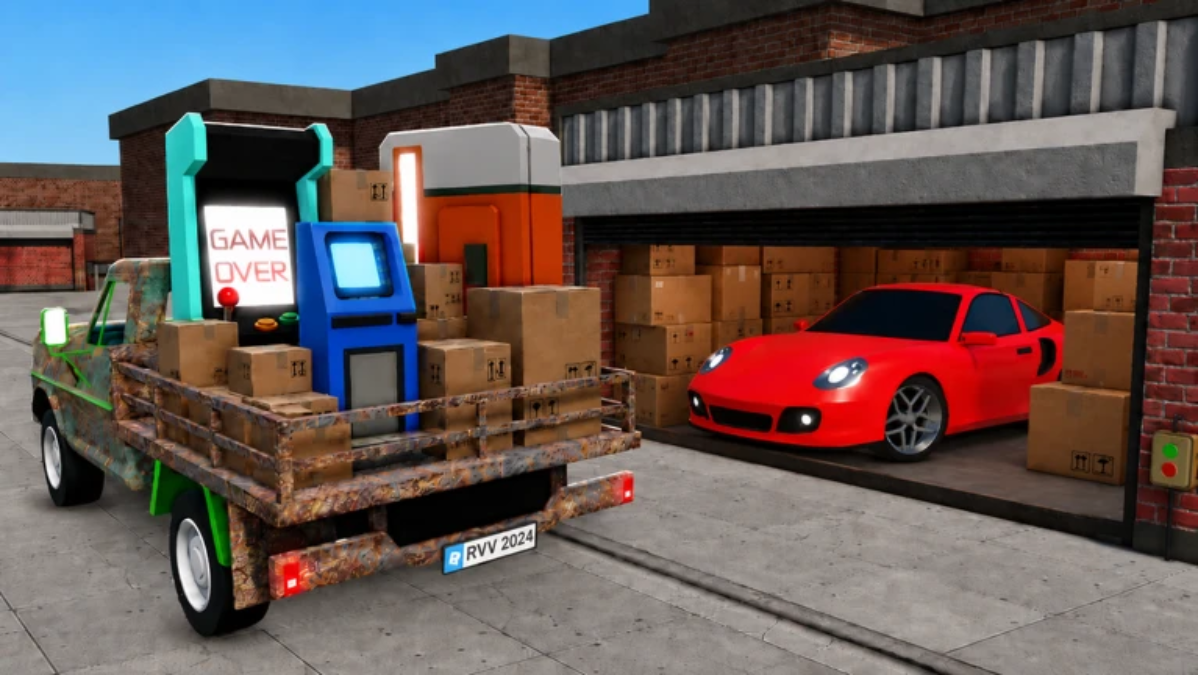
All Garage Locations & Net Worth Requirements
Here’s the complete progression path for garages. Each new garage requires a higher net worth but offers significantly better items.
| Garage | Net Worth Required |
|---|---|
| Scrap Garage (Junkyard) | 0 (Starting area) |
| Stable Garage (Farm) | 10,000 |
| Shipyard | 125,000 |
| Dock Garage | 400,000 |
| Warehouse Garage | 1,200,000 |
How to Progress Through Garages
- Start at the Junkyard and grind until you have enough for the next tier.
- Buy a Trailer as soon as you can afford one. More storage space means fewer trips back to your shop, which means more time grinding auctions.
- Upgrade your storage regularly. Trailers are expensive, but they’re one of the best investments in the game.
The jump from Scrap Garage to Stable Garage requires 10,000 net worth. It takes some grinding, but the rewards at the Farm are worth it.
Item Cleaning: When It’s Actually Worth It
Sometimes you’ll find a rare item that’s dirty. You can clean these at the Shopping Mall.
How to Clean Items
Make your way to the Shopping Mall and find the Item Cleaning Service. Place your dirty item in, and it will come out pure, which increases its value.
When Should You Clean Items?
I only recommend cleaning expensive or rare items. Don’t waste money cleaning cheap stuff like tissue boxes, the cleaning cost will eat into your profits.
The cleaning service is commonly overlooked by players, which means you can find undervalued dirty items and flip them for profit after cleaning.
Item Grading: Boost Your Item Values
Once you have a really rare item, you can grade it to increase its value even further.
How Grading Works
Visit the Grade NPC and submit your item. A good grade can significantly boost the item’s sale price. For example, an item graded at two stars will see a noticeable value increase.
When Should You Grade Items?
Same rule as cleaning: only grade your most expensive items. Don’t grade cheap items like tissue boxes, the return isn’t worth it.
Grading and cleaning together can multiply an item’s value substantially. If you find a rare dirty item, clean it first, then grade it for maximum profit.
The Time Capsule Explained
The Time Capsule is a special mechanic that many players don’t fully understand.
How It Works
If you seal an item inside a Time Capsule, it has a chance to gain a special time mutator while you’re online. The capsule takes a new roll every 5 minutes, each with a chance to add a mutator.
There are tons of different mutators you can get, and rarer ones are harder to land.
Important: It Only Rolls While You’re Online
The capsule only rolls for mutations while you’re actively playing. The more time you spend in-game, the more chances it gets. If you log off, the rolling stops.
If you’re hunting for a specific rare mutation, plan for long play sessions and keep valuable items in your capsule.
How to Boost Your Luck
Luck is the most important stat in Storage Hunters. Higher luck means better items, rarer mutations, and more money. Here are all the ways to increase it:
1. Collection Book
Completing your Collection Book rewards you with luck points. Prioritize this.
2. Lost Items
Finding lost items contributes to your Collection Book and directly boosts luck.
3. Trophies
Trophies found inside containers boost mutation probabilities based on their mutation types. For example, if you have three trophies of a specific mutation, that’s a significant boost for that mutation type.
4. Decor
Some decor items provide luck boosts. Check your decor inventory and place anything that mentions luck.
5. Playing with Friends
You get a 5% luck boost when a friend joins your game. The more friends, the better.
6. Energy Drinks
Visit the Energy Drink shop at the Shopping Mall. These drinks provide temporary but powerful luck boosts. They’re relatively cheap, and the higher your net worth, the better drinks you can access.
7. Accessories
Some accessories extend the duration of your luck boosts, making energy drinks even more effective.
Energy Drinks: How to Use Them Effectively
At the Shopping Mall, there’s an Energy Drink shop with tons of different options. These drinks can increase your luck by a significant amount for a limited time.
How to Maximize Energy Drinks
- Equip accessories that extend boost durations before drinking.
- Plan your grinding sessions around your drink timers.
- Use higher-tier drinks as your net worth increases, they become available as you progress.
The combination of energy drinks and duration-extending accessories is one of the most powerful mechanics in the game for maximizing profit per session.
Upgrades You Should Prioritize
Your upgrades menu has a lot of options, and not all of them are equally important. Here’s what I recommend focusing on:
| Priority | Upgrade | Why |
|---|---|---|
| 1 | Advertising | Speeds up customer arrivals |
| 2 | Selling Space | Allows more items to be sold at once |
| 3 | Trophy Capacity | Critical for increasing mutation chances |
Why Trophy Capacity Matters
Trophies boost mutation probabilities. More trophy capacity means more trophies active at once, which means higher chances for rare mutations like Rainbow, Secret, Void, and Black.
Check your stat menu to see all available mutation types and their current probabilities. This helps you understand which trophies to prioritize.
Game Passes: Which Ones Are Worth Buying?
If you’re considering spending Robux, here are the game passes I recommend:
| Game Pass | Priority | Why |
|---|---|---|
| Lucky Crate | High | Better luck on crate openings |
| Celebrity Customers | High | Rare spawns that increase item sale value by 70% or more |
| Other passes | Low | Nice to have but less critical than the two above |
Celebrity Customers is particularly powerful. These rare customers can buy your items at significantly higher prices, which adds up quickly over time.
NPC Quests & Index Rewards
Don’t ignore the NPCs scattered around the map. Many of them offer quests that provide useful boosts upon completion.
Additionally, Index Rewards are worth completing. These track your progress and reward you for collecting and discovering items. Make it a habit to check your index and claim rewards as you earn them.
Fishing Rods: What You Need to Know
A common question I see: Can you repair a broken fishing rod?
No, fishing rods cannot be repaired. They are consumables, and the wrench won’t work on them.
Here’s how rods work:
- Each rod has a set number of reels at full condition.
- A rod found in worse condition has fewer reels remaining.
- Once the reels run out, the rod breaks permanently.
- You’ll need to grab a new one and keep fishing.
Don’t waste time trying to repair them, just replace broken rods and move on.
All Mutations Overview
You can view all available mutations by opening your settings and navigating to the stat menu. Scroll down to see the full list:
- Rainbow
- Secret
- Void
- Black
- And many more
Each mutation type has its own probability, which is influenced by your trophies, luck stat, and active boosts. Understanding which mutations are most valuable helps you prioritize which trophies to collect and display.
Summary: Your Step-by-Step Progression Plan
Here’s the complete roadmap for progressing from beginner to end-game:
- Complete the tutorial.
- Grind the Junkyard (Scrap Garage) until you hit 750 net worth.
- Grab the Key from the bridge near the farmyard. Don’t sell it.
- Unlock the Back Alley door with the Key and sell the Scythe.
- Collect Back Alley accessories—prioritize bid zone width, aerial speed, and boost duration.
- Complete your Collection Book and find all lost items for luck bonuses.
- Buy a Trailer for more storage space.
- Move to the Farm (Stable Garage) at 10,000 net worth.
- Use the Shopping Mall for energy drinks, item cleaning, and grading.
- Progress through Shipyard (125K), Dock (400K), and Warehouse (1.2M) as your net worth grows.
- Prioritize Advertising, Selling Space, and Trophy Capacity upgrades.
- Play with friends for the 5% luck boost.
Storage Hunters rewards players who understand its systems. Luck, accessories, energy drinks, and upgrades all work together, ignoring any one of them slows down your progress.
My top three tips for new players:
- Never sell the Back Alley Key.
- Play in a private server if you want to grind efficiently.
- Complete your Collection Book early, the luck bonuses compound over time.